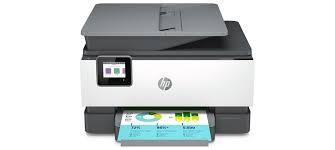
Most users will eventually need to switch from using an older printer to HP Printers, and this guide will show how to set up and troubleshoot them effectively. While HP printers are easy to operate and maintain, proper setup is essential for optimal results.
Learn how to print documents directly from the hard drive of your computer – either wirelessly or using wired connections.
Step 1: Unboxing Your printer and assembly
Remove the printer from its packaging. Remove all extras including manuals, power cords, and ink cartridges. Follow these guidelines.
-
Place the printer on a level, firm surface.
-
How to install cartridges is explained in the user guide.
-
Adjust the paper guide to fit your input tray.
-
By connecting the printer to a power outlet and pressing the power button, it will be activated.
After initial setup, your printer is ready to use. Online Printer Support can provide more assistance.
Step 2: Connect your printer to the computer
USB Connection
USB connections are the most common and easiest method. Directly connects your computer to the printer.
Windows
Windows allows you to connect your printer using a USB cable.
Windows must install all necessary drivers. If you do not want to add a printer or scanner, click on Settings > Devices > Printers & Scanner.
Mac
Connect your Mac to your printer using a USB cord. Enter the printer in System Preferences and turn on Printers & Scanners on Mac. Press the + button to select your HP printer.
Wireless Connection
Wireless connections are more flexible as they enable multiple devices to connect without physically connecting.
-
Windows
-
Choose your Wi-Fi network in the Wireless Setup menu of your printer. Enter the network password.
-
Click on Settings > Devices and Printers. Click on Add a Printer.
-
Select your HP printer by following the instructions displayed on the screen.
-
-
Mac
-
Choose your Wi-Fi network in the Wireless Setup menu of your printer. Enter the network password.
-
Choose Printers & Scanners in the System Preferences of Mac. By pressing the + button, select the HP printer that you wish to add.
-
Step 3: Installing drivers and software
Installing the correct drivers and software will ensure that your printer functions optimally.
-
Windows
-
HP Support offers the latest drivers for your printer on their website.
-
Install the file according to the instructions.
-
-
Mac
-
HP Support offers the latest drivers for your printer.
-
Install the file by following the instructions.
-
This is an important step to ensure compatibility with all features.
Step 4: Printing your Document
As soon as you have set up your printer, you can start printing.
-
Open the Document
-
Use the software you want to use, such as Adobe Acrobat and Microsoft Word, to obtain the document that you wish to print.
-
-
You can also print the menu
-
Windows: Press Ctrl+Print or File >Print.
-
Press Command + P or click File > Print.
-
-
Select Your Printer
-
Choose your HP printer from the Print dialog box.
-
-
Configure Printing Options
-
Choose the number of copies you want, the page range, and the orientation.
-
-
Print
-
Click the Print button to print.
-
Step 5: Manage print jobs
It may be necessary to manage your printing jobs, especially if they’re stuck in the queue.
-
Windows
-
Click on the printer icon located in the system tray to open the print queue.
-
Printing jobs can be canceled or restarted as needed.
-
-
Mac
-
Select System Preferences, then Printers & Scanning.
-
To manage print jobs, click on Open Print Quota and then select your printer.
-
Step 6: Troubleshooting Common Issues
No Printer Found
-
Solution
-
Make sure your printer is connected to the network and on.
-
Restart your printer as well as your computer.
-
The HP Printer not printing can be fixed by installing the printer driver.
-
Print Jobs Stuck in Queue
-
Solution
-
Open the print queue and cancel all documents to fix the printer problem.
-
Restart the printer and try printing again.
-
Poor Print Quality
-
Solution
-
If necessary, replace the ink or toner.
-
You can use the maintenance menu to clean the printhead.
-
Choose the correct paper type and print settings.
-
Wireless Connection Issues
-
Solution
-
Move the printer nearer the router to improve the signal.
-
The wireless configuration menu on the printer allows you to connect the printer wirelessly.
-
Restart your router.
-
Step 7: Regular Maintenance
Regular maintenance can extend the life of your vehicle and prevent many problems.
-
Cleaning your printer
-
To remove dust, clean the interior and exterior of your printer regularly.
-
-
Update Drivers
-
To keep your printer driver updated, check the HP Support site frequently.
-
-
Monitor Ink Levels
-
Check and replace cartridges regularly to avoid running out of toner or ink during important printing jobs.
-
Final Thoughts
Follow these simple steps to start printing from an HP Printer. It is easy to unpack and assemble the printer, connect it to your device, install required drivers, and manage print orders.
Regular troubleshooting and keeping up with your printer can result in optimal performance. This guide will help you print wirelessly or with a USB connection.
Contact the team for HP printer support if you have any questions.